Open ID Connect implementation on APIM
Implementing OpenID Connect Azure API
Why OpenID connect in an API on AZURE APIM?
The Need
To improve authentication and to secure endpoints of an API on Azure APIM. In this case, there are two use cases:
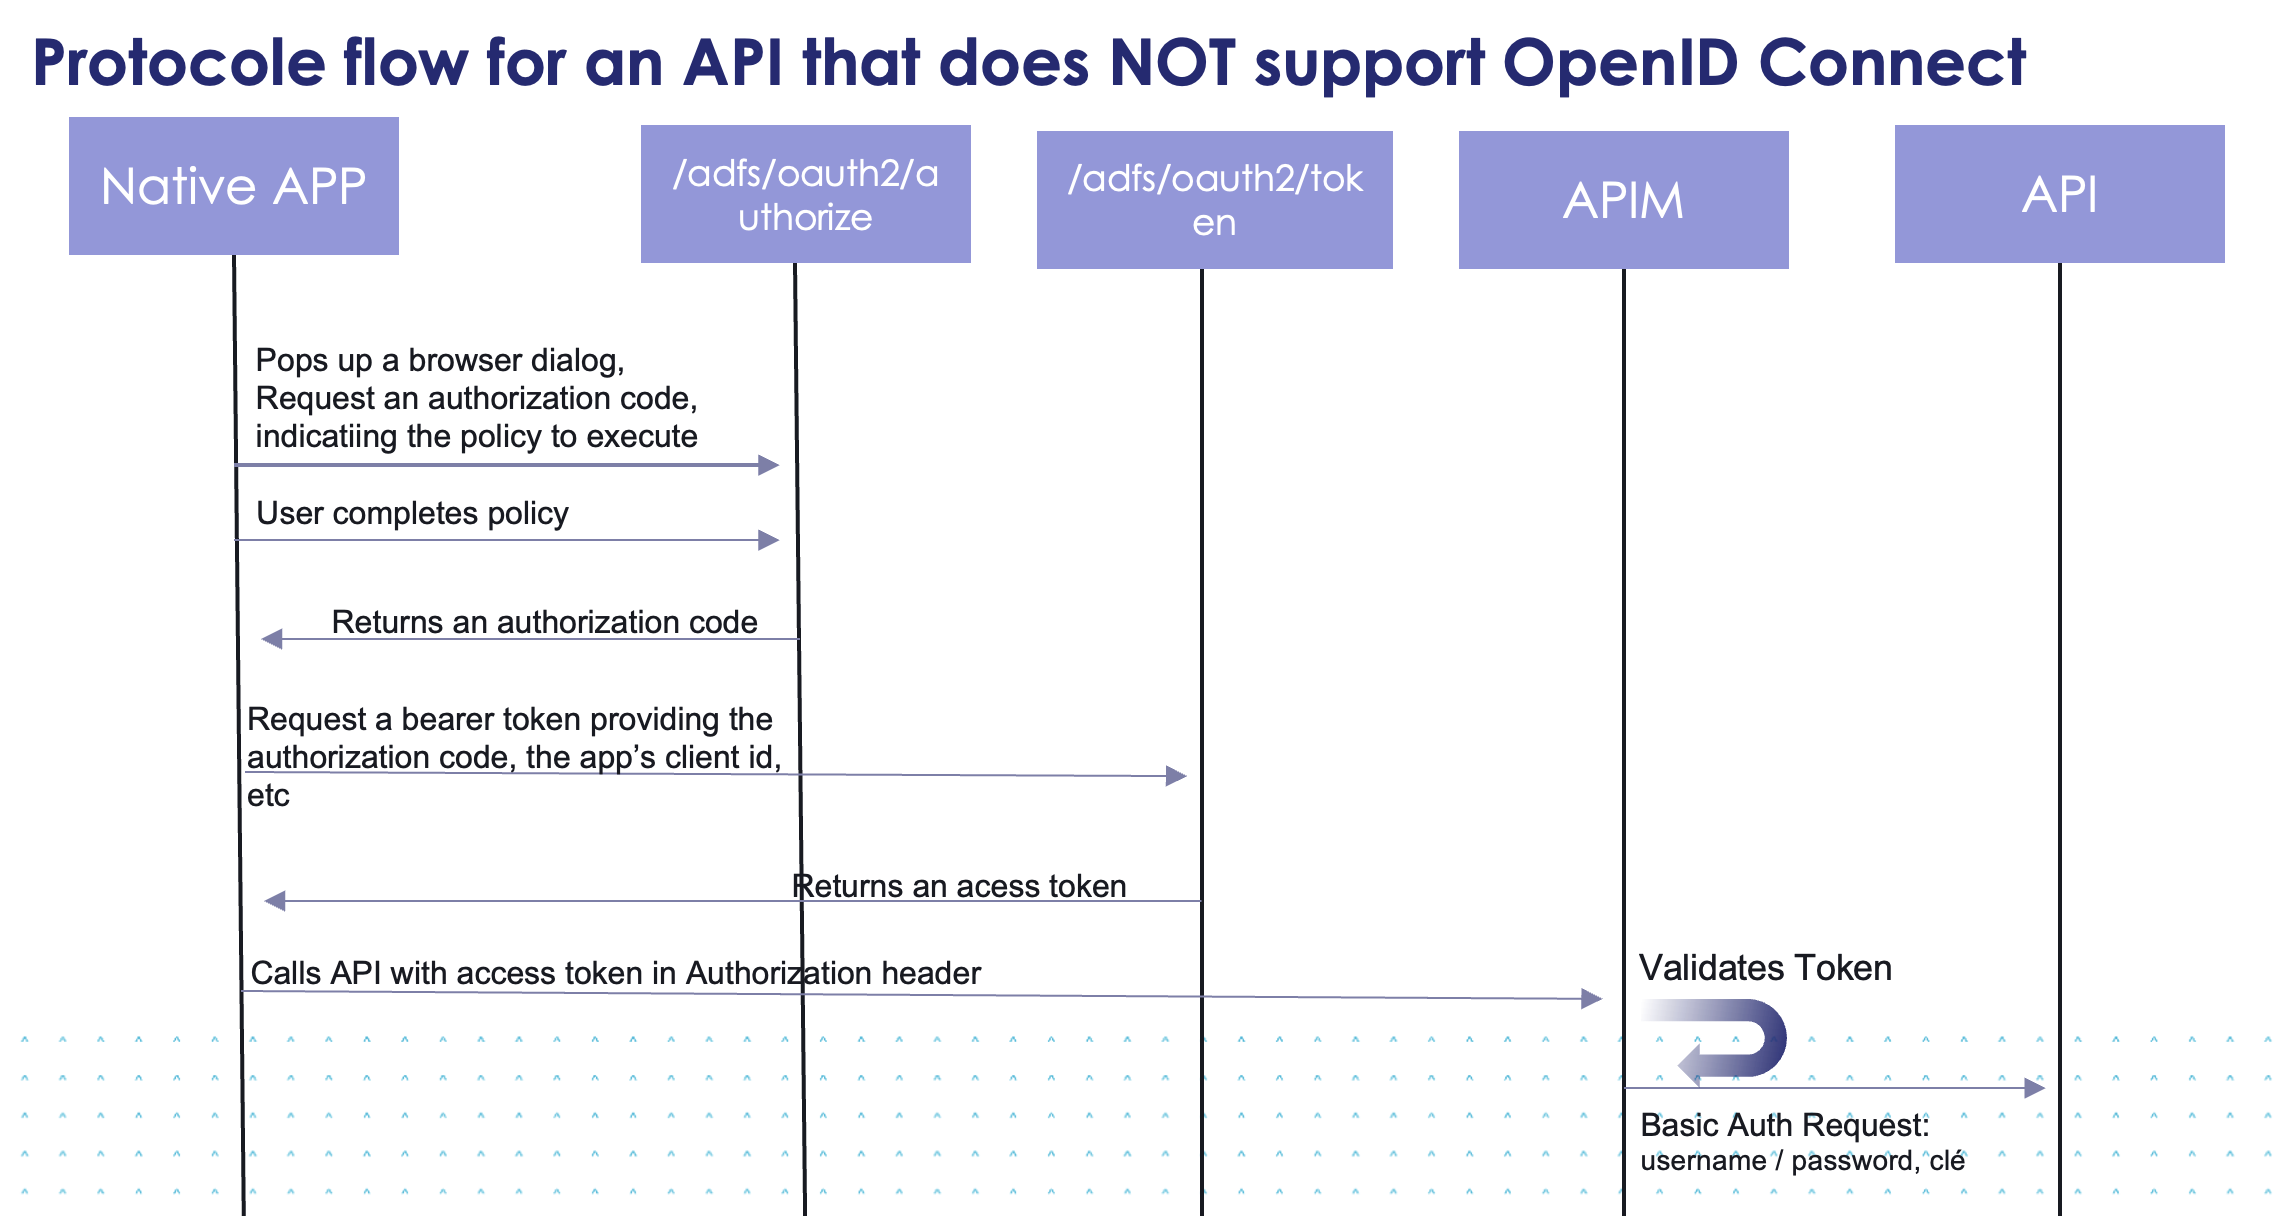
- Either the API does NOT support OpenID Connect / OAuth, so the APIM will check the token and what it contains (audience, roles), and then, will call the adjacent API with the authentication mode of the 'API (basic authentication: username/password, key, etc.). Checking the token is mandatory.
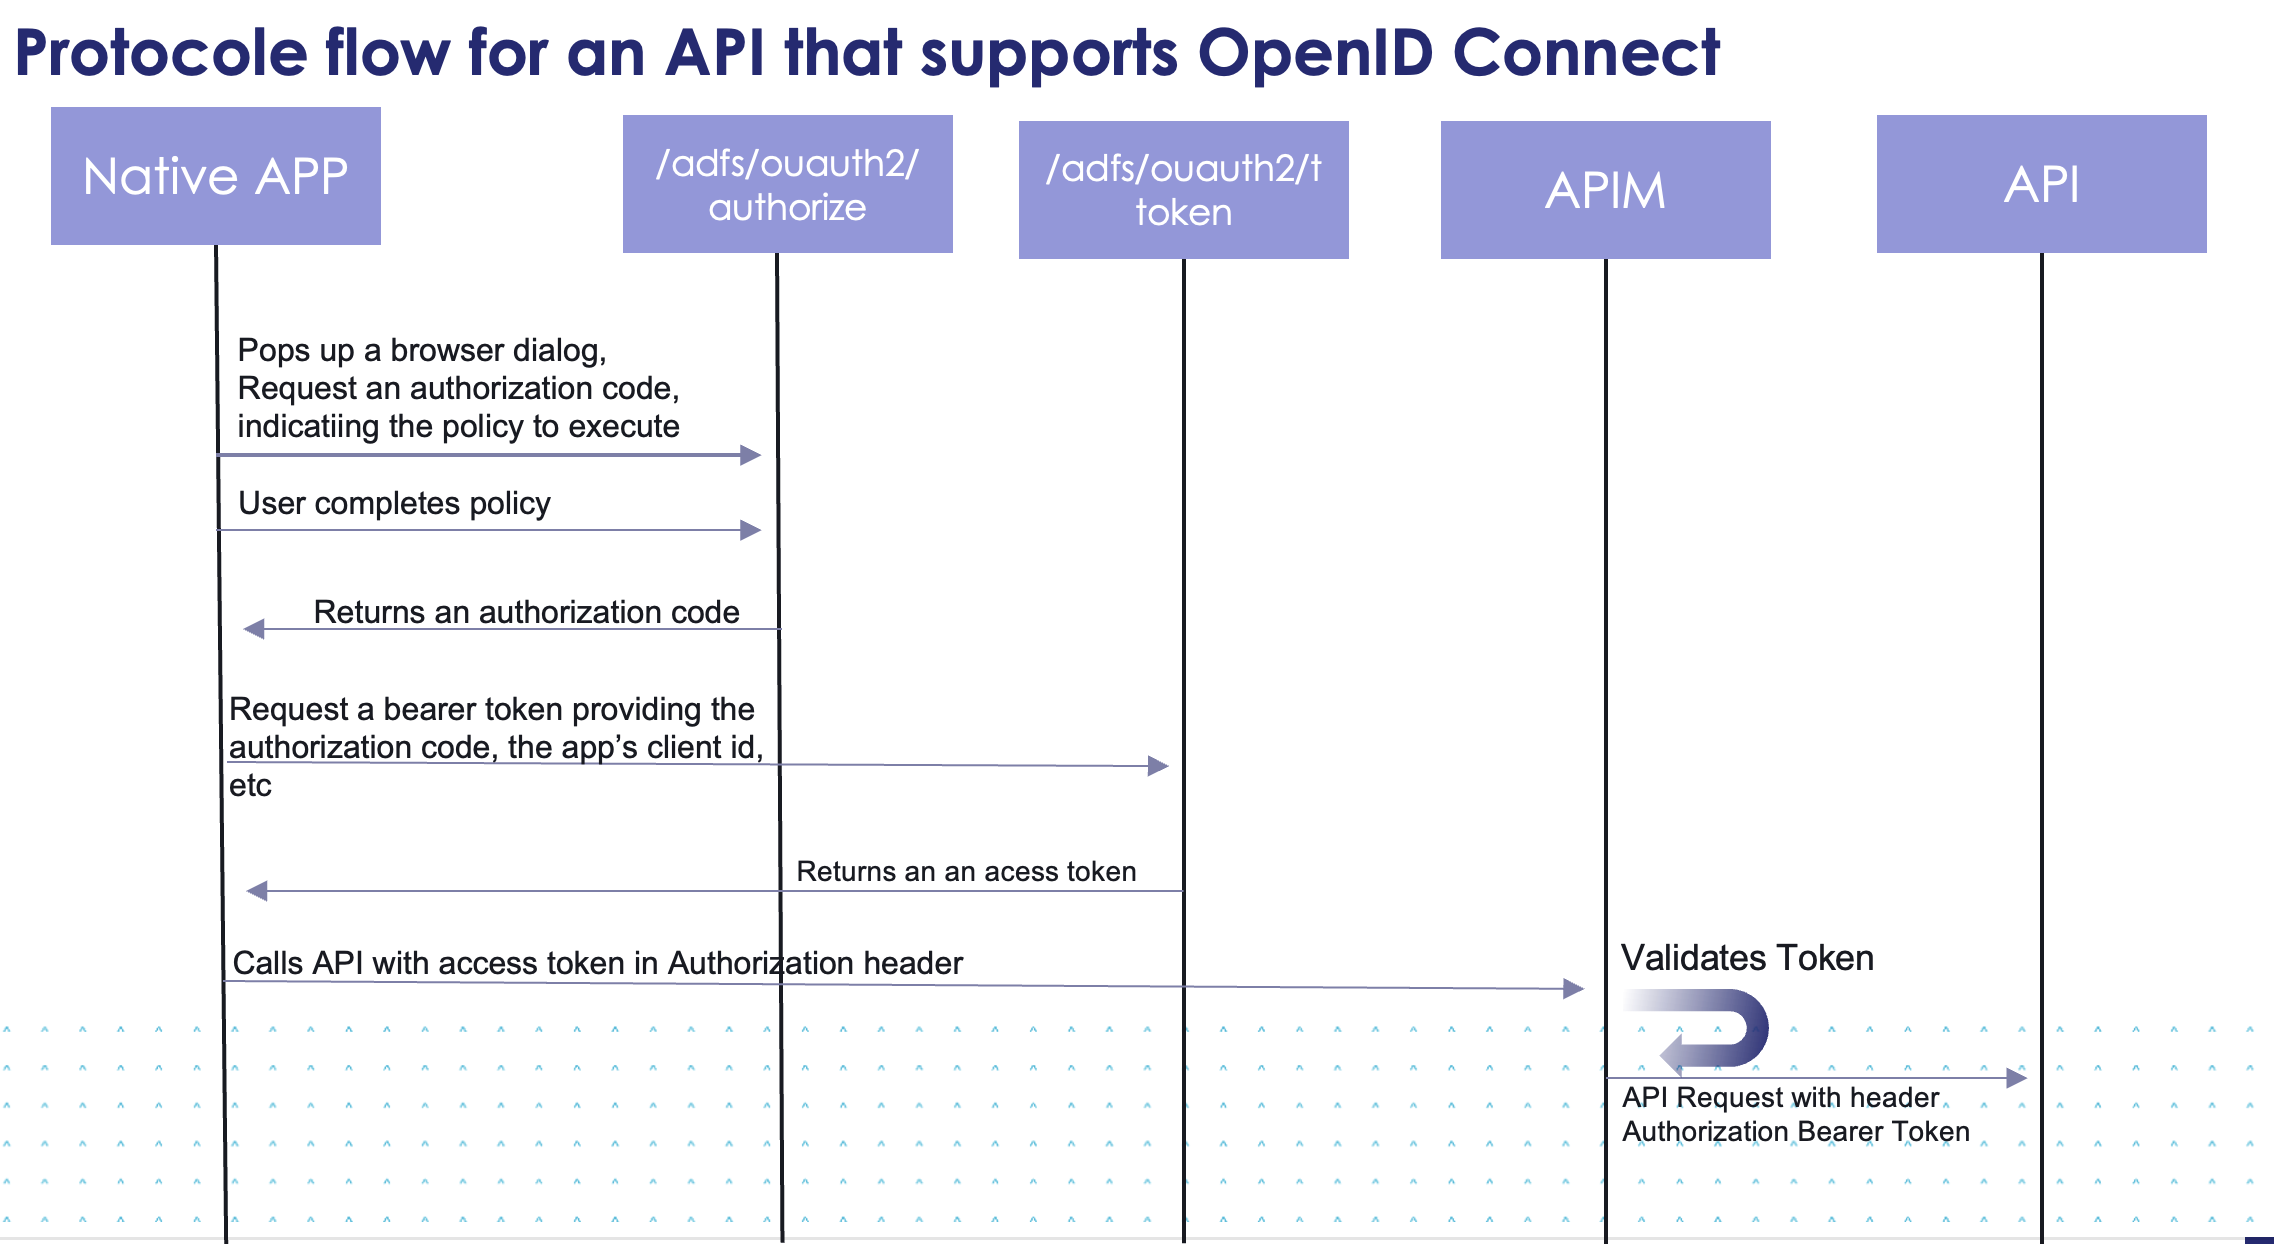
- Either the API already supports OpenID Connect / OAuth, so the APIM is used to pre-check the token. In this case, the token check could be optional. The token is passed in the header from the APIM to the API request.
The OpenId Connect solution
OpenID Connect offers a robust framework for authentication and authorization through two major axes:
-
Firstly, OIDC enables Single Sign-On (SSO), allowing users to authenticate once and access multiple APIs seamlessly. With OIDC in front of an API on Azure APIM, users can log in using their preferred identity provider. centralizes authentication, making it easier to manage user identities.
-
Secondly, OIDC provides token-based authentication, issuing tokens upon successful authentication. These tokens, such as access tokens are securely generated and can be used to access protected resources on the API. Only Access Tokens allow access to an API (The id token allows you to recover an access token and a refresh token, and the refresh token allows you to regenerate an access token when it has expired).
-
In addition to authentication, OIDC also provides claims about the authenticated user, such as their identity or role. These claims can be used for fine-grained authorization, enabling APIs to make access control decisions based on user attributes.
Setting up OpenID Connect with Azure APIM
In order to integrate OpenID Connect (OIDC) with an API on Azure API Management (APIM) we will work with these couple of steps.
-
Step 1: Register a new App in Entra ID, configure scopes, roles, and roles assignments to your app. Gather App details such as client id / tenant id, default scope...
-
Step 2: Configure Azure API Management: Select an API > Add a policy to check token validity, with audience and roles. Gather APP details such as clientId, a client_secret, tenantID, the scope.
Step 1 Registering a new App
Register Your APP with the trustnest Provider.
1 - Create an APP Registration in the Azure Portal with Post It Service Now
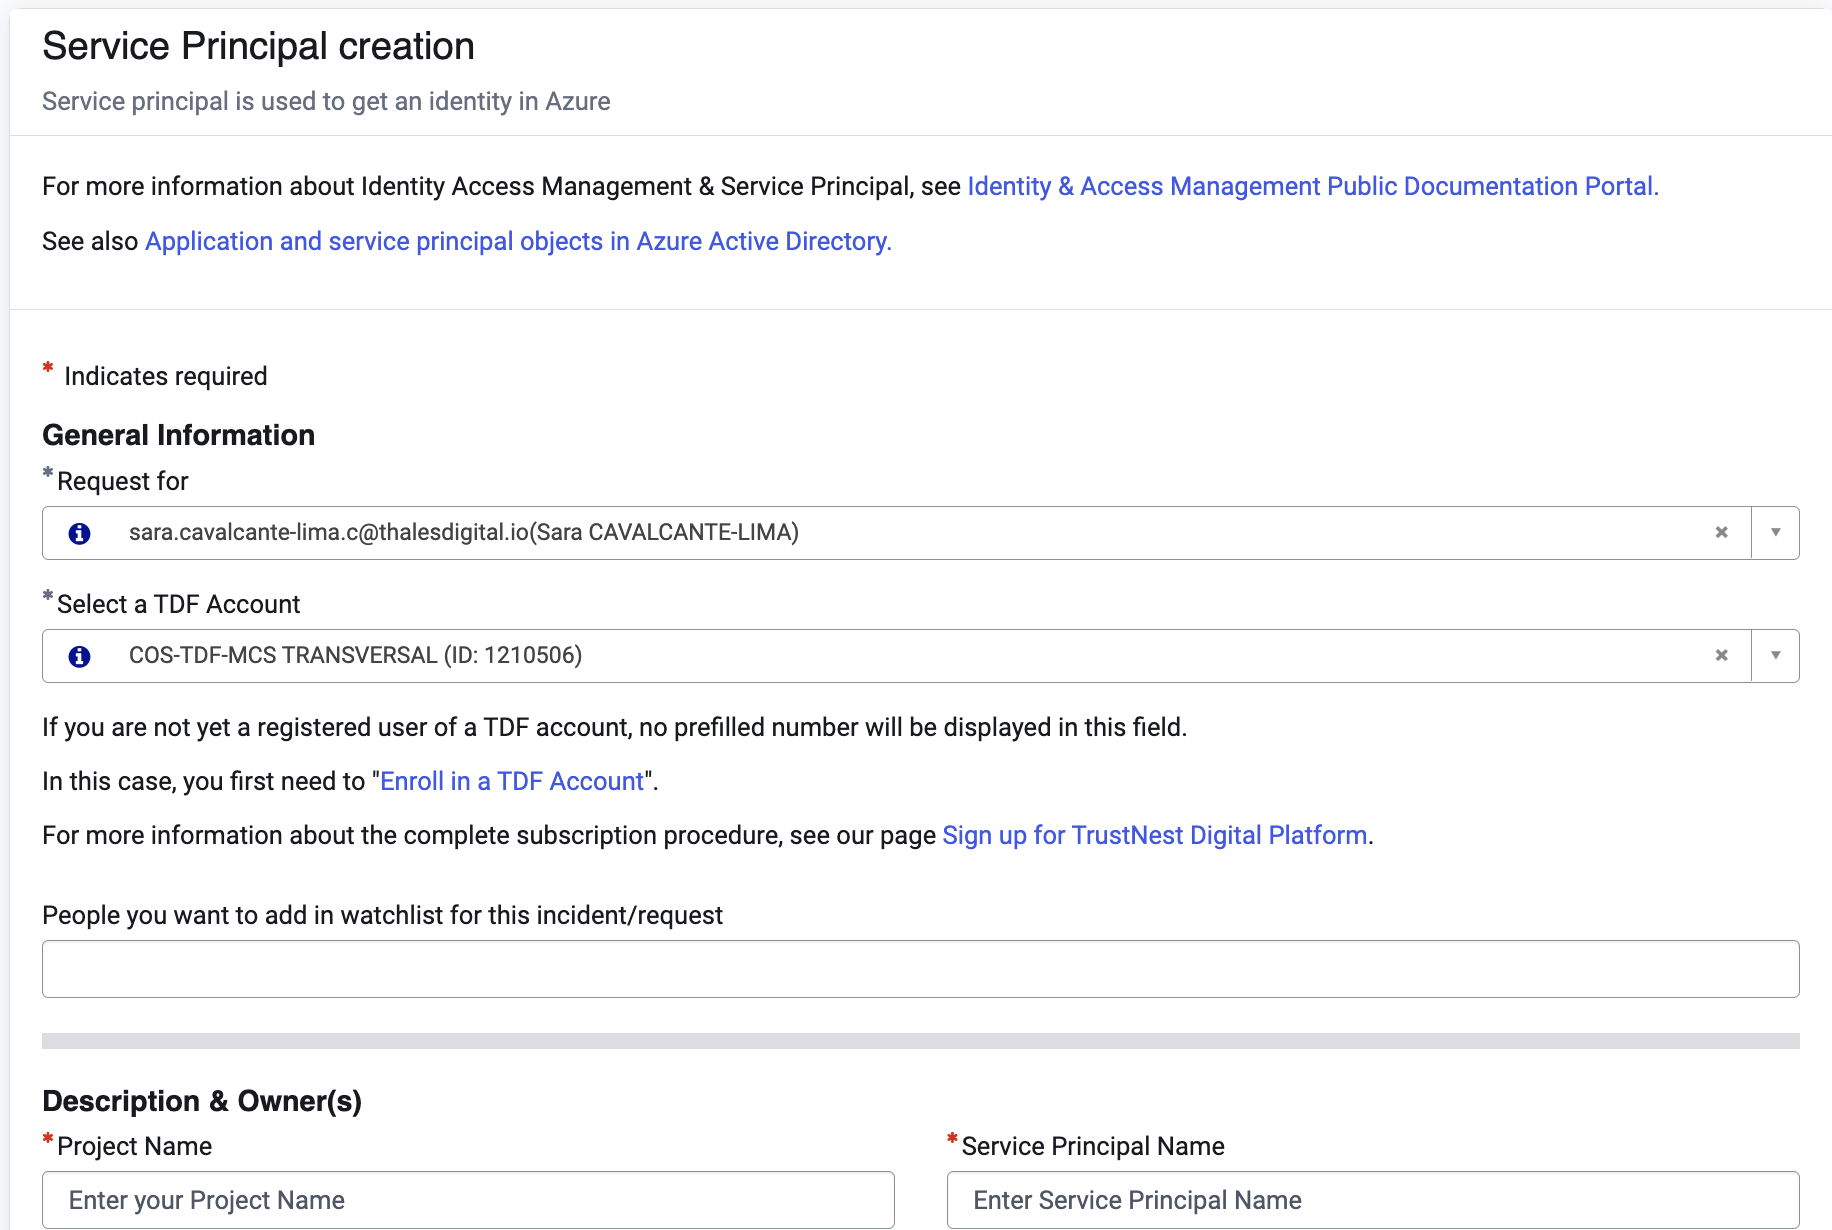
To register an APP you have to fill the form ”Service Principal creation” on Post It Service Now and you will receive a link with the new APP already created.
2 - Gather your APP information
Once you have the new APP Registration, we will need to keep important information: the client ID, the tenant ID and a scope that will be created later.
The tenant ID will identify the audience that can sign in the application and the clientID is a unique identifier for the APP.
A specific scope is used when sensitive information as mail, name, etc are required to the request. Otherwise Default option can be created.
3 - Add a new Scope to your APP.
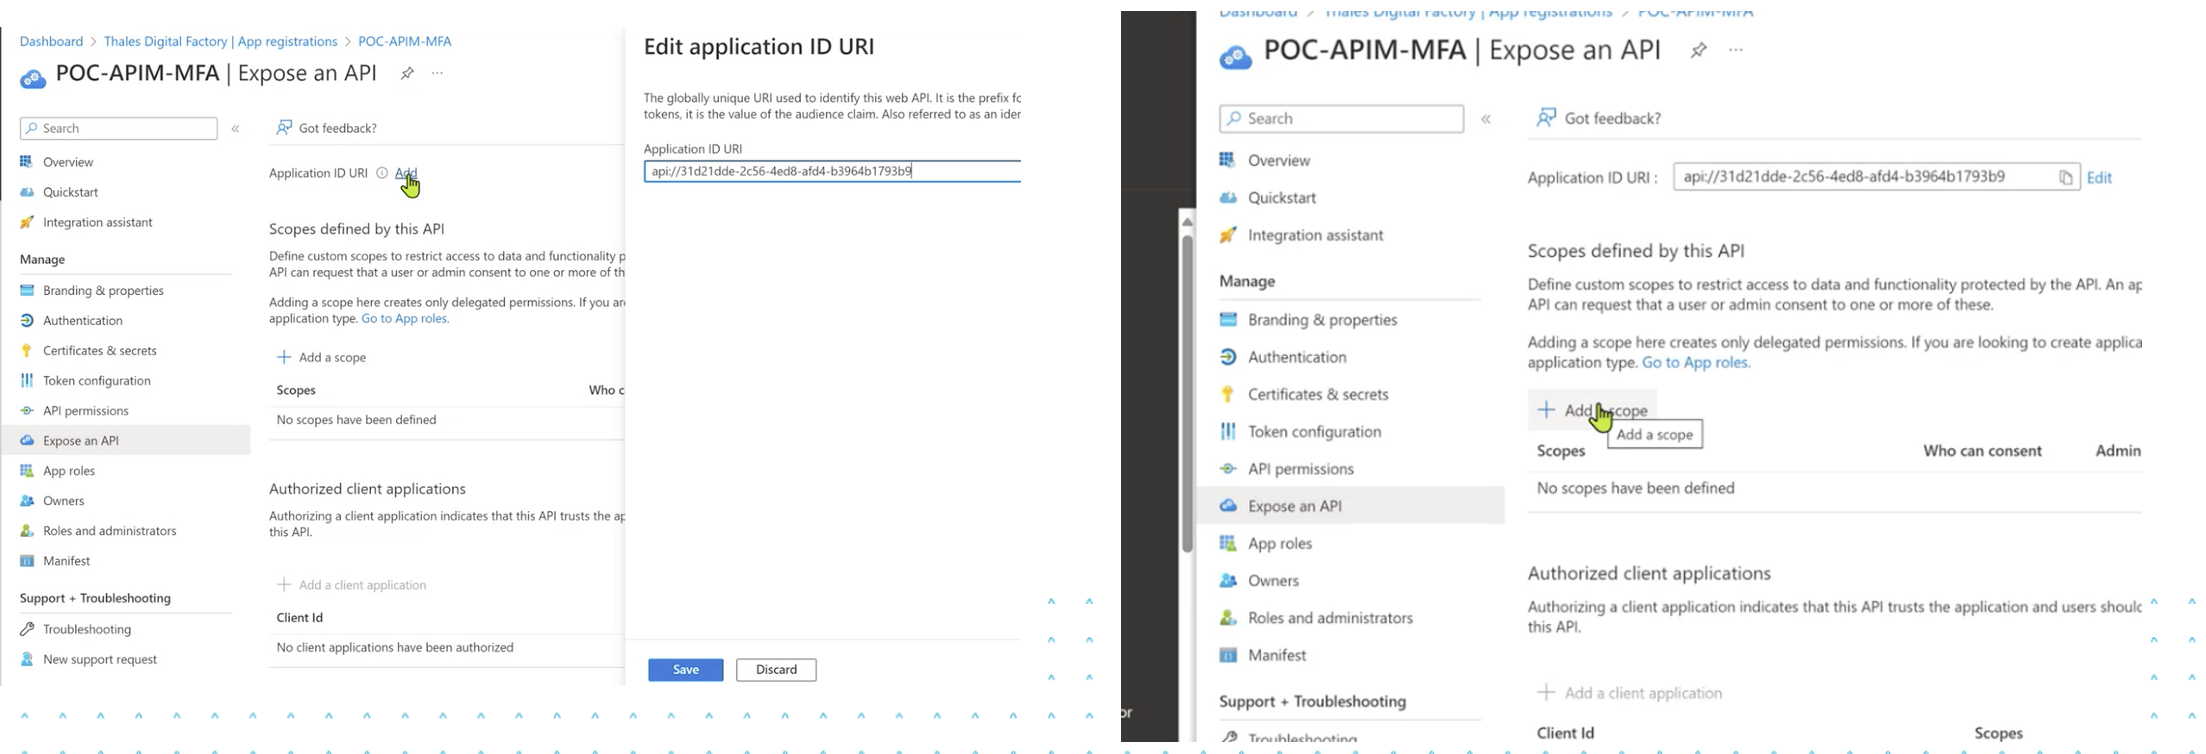
The app previously created in APP Registration must be exposed. To do so, we have to go to Expose an API section and in front of Application ID URI click on Add and a unique URI will be created. Also we will have to add a Scope par default.
4 - Authentication settings
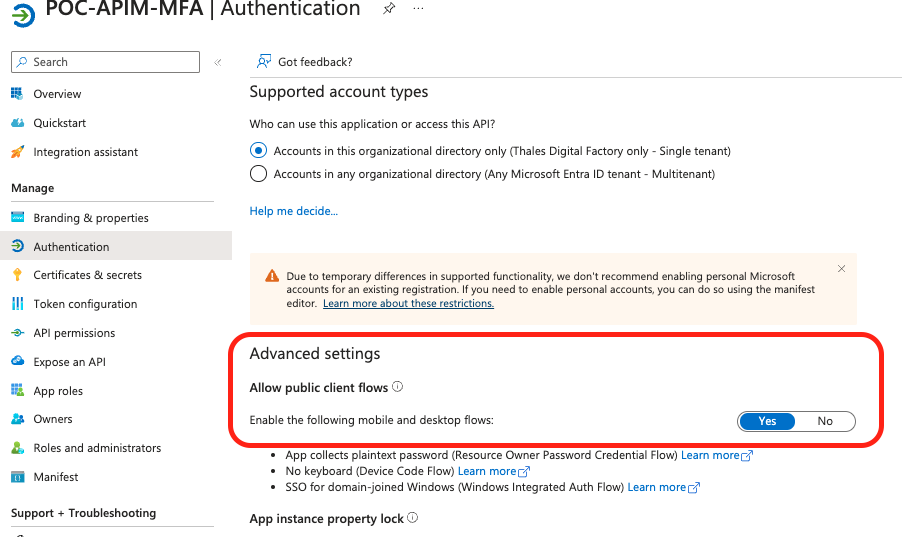
In order to allow the flow from the API to the APP, enabling flows is needed. In the menu Authentication > Advanced Settings > Allow public client flows, click on "Yes".
5 - Assignments
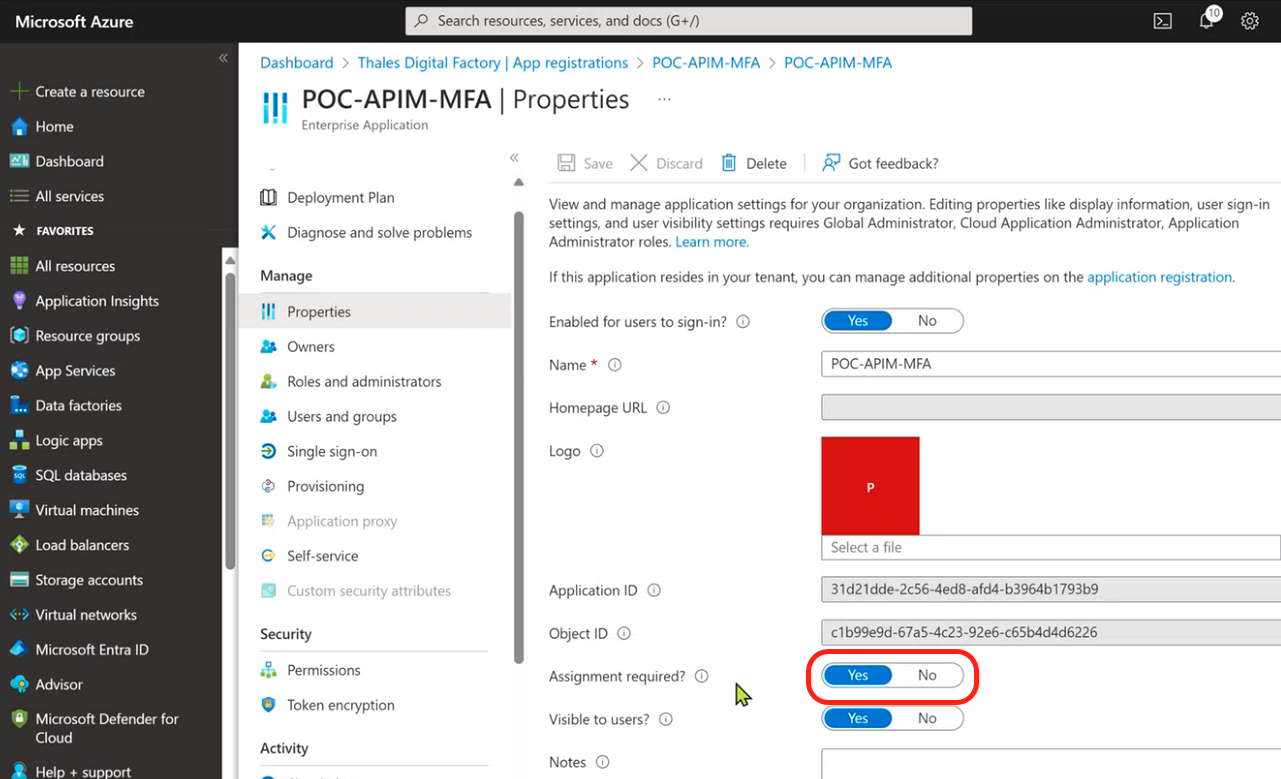
Once the APP is set, we can configure Assignment requirements. Go to the section Enterprise Management > Properties > “Assignment required ?” and check YES. If you have NO, this will allow any user of the tenant thalesdigital.io to Authentify to the APP.
6 - Defining Roles
During the app Registration process we can define Roles. They will be assigned after to users in the section Entreprise Application from the APP. In order to create a new role, just go to Manage Section then App roles to create, modify and list all them. To create new roles, just go to App roles section , then click on + Create app role.
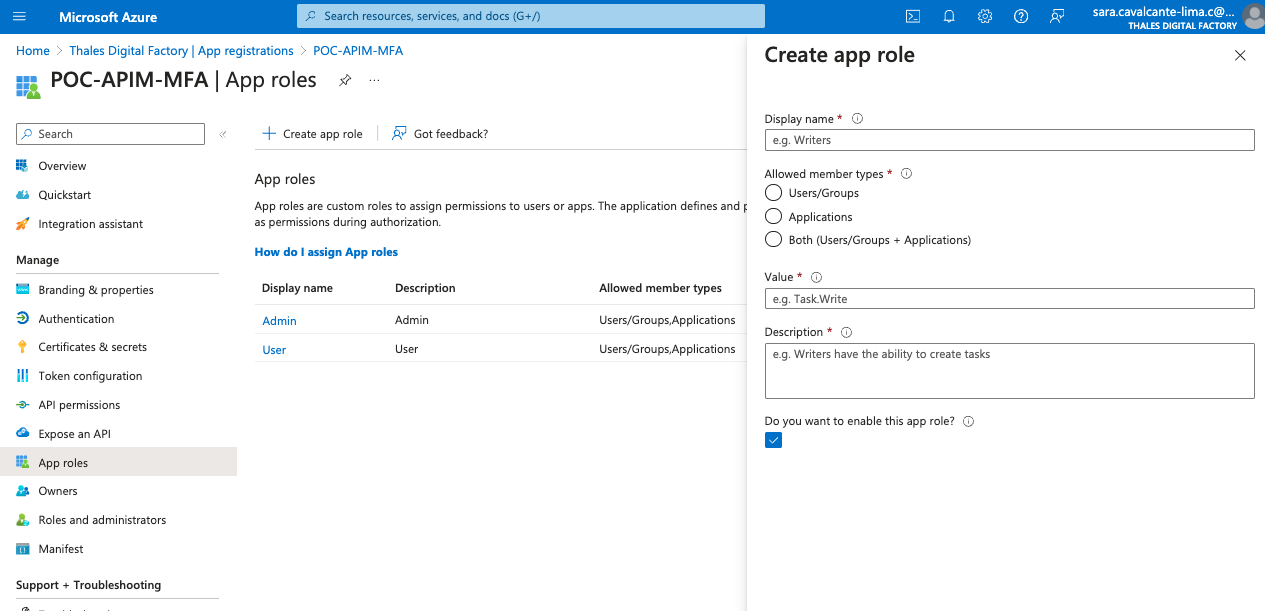
Then, fill the form
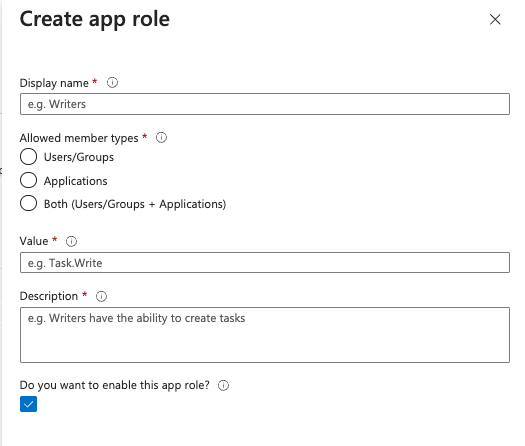
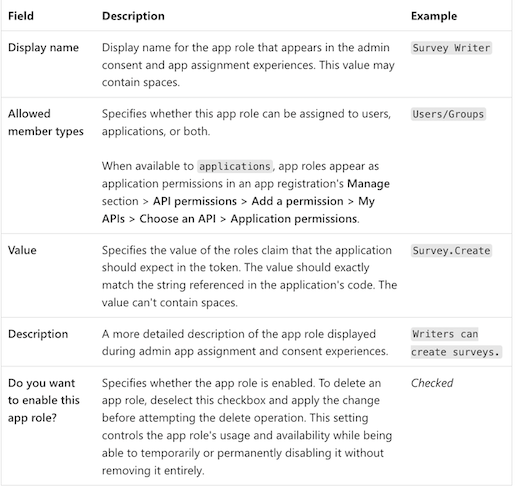
6 - Assigning Roles to Users and Groups
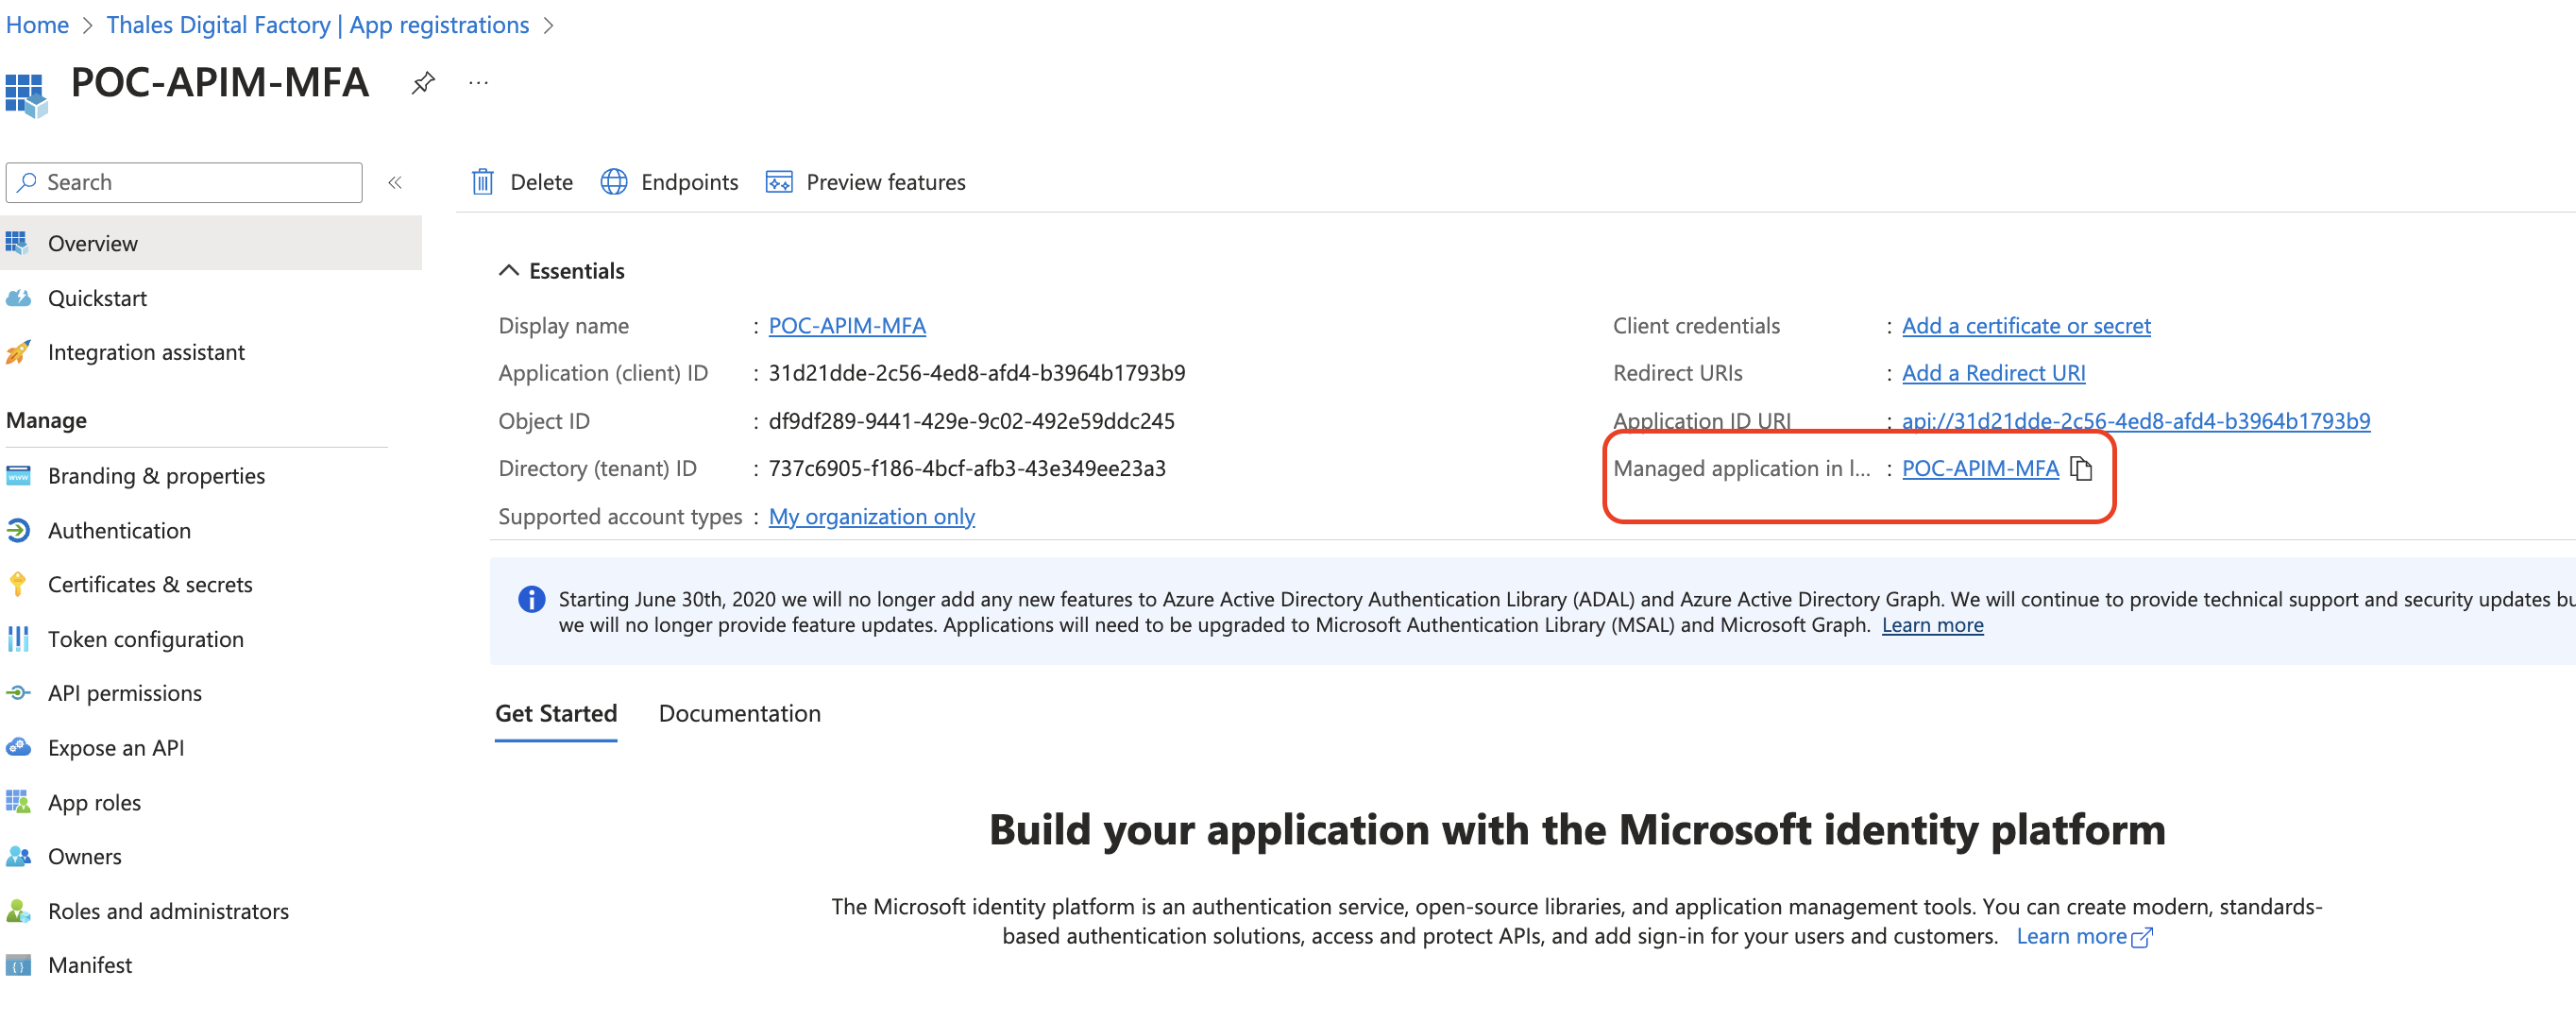
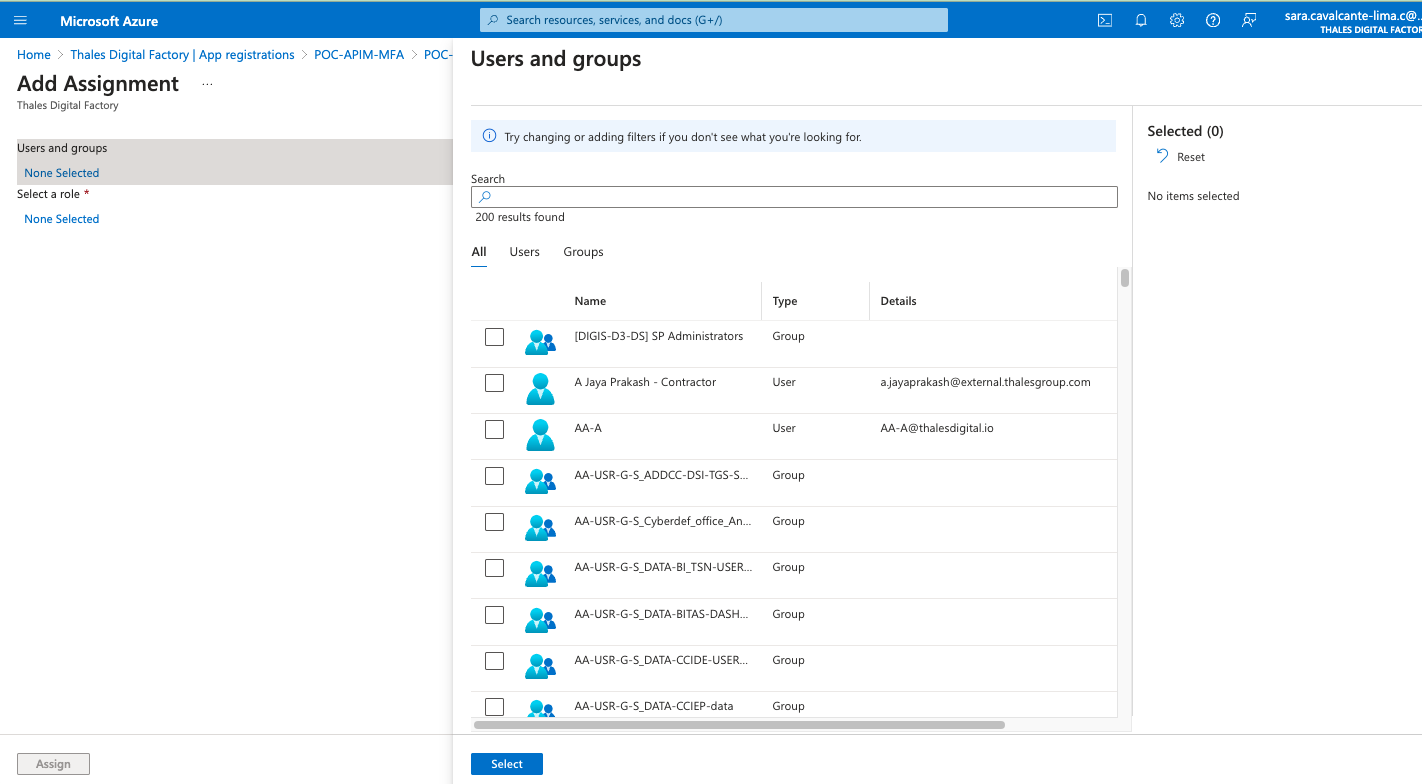
Once roles are created in APP Registration, we have to attribute Roles to Users. In the Overview page, we can access directly the Entreprise Configuration of the Application in the tenant concerned. Once in the management page, go to Users and Groups > + Add user/group

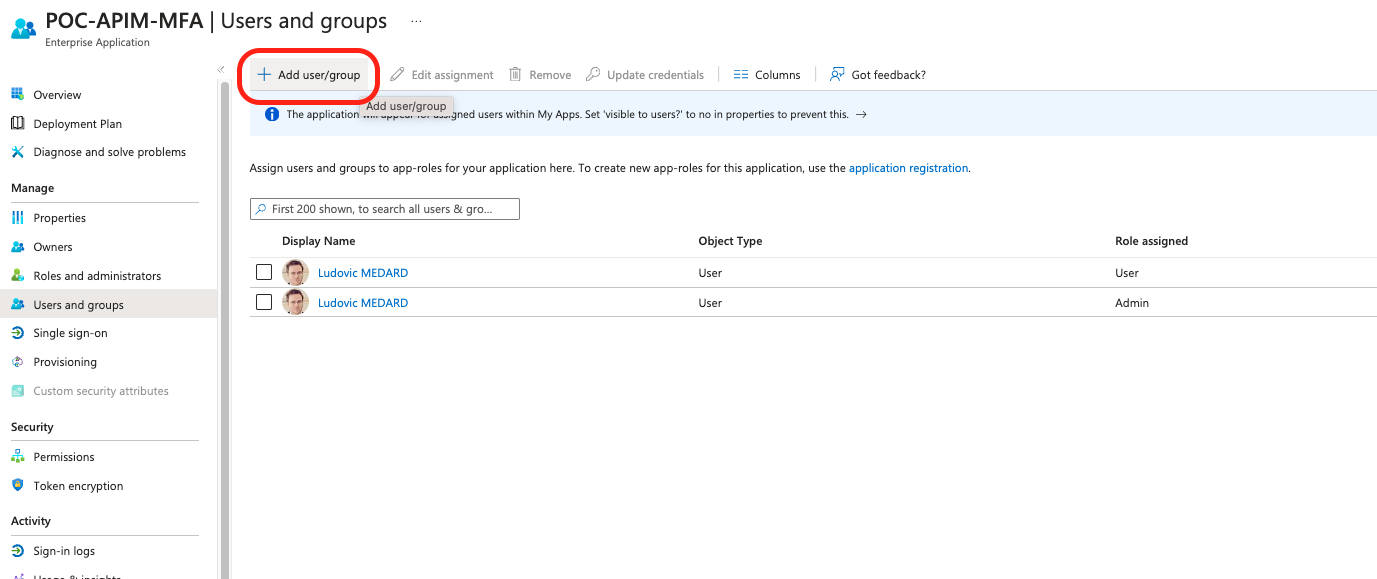
Then choose a User or a Group then go to Select a Role section to assign a role.
Step 2 Configuring Azure API Management
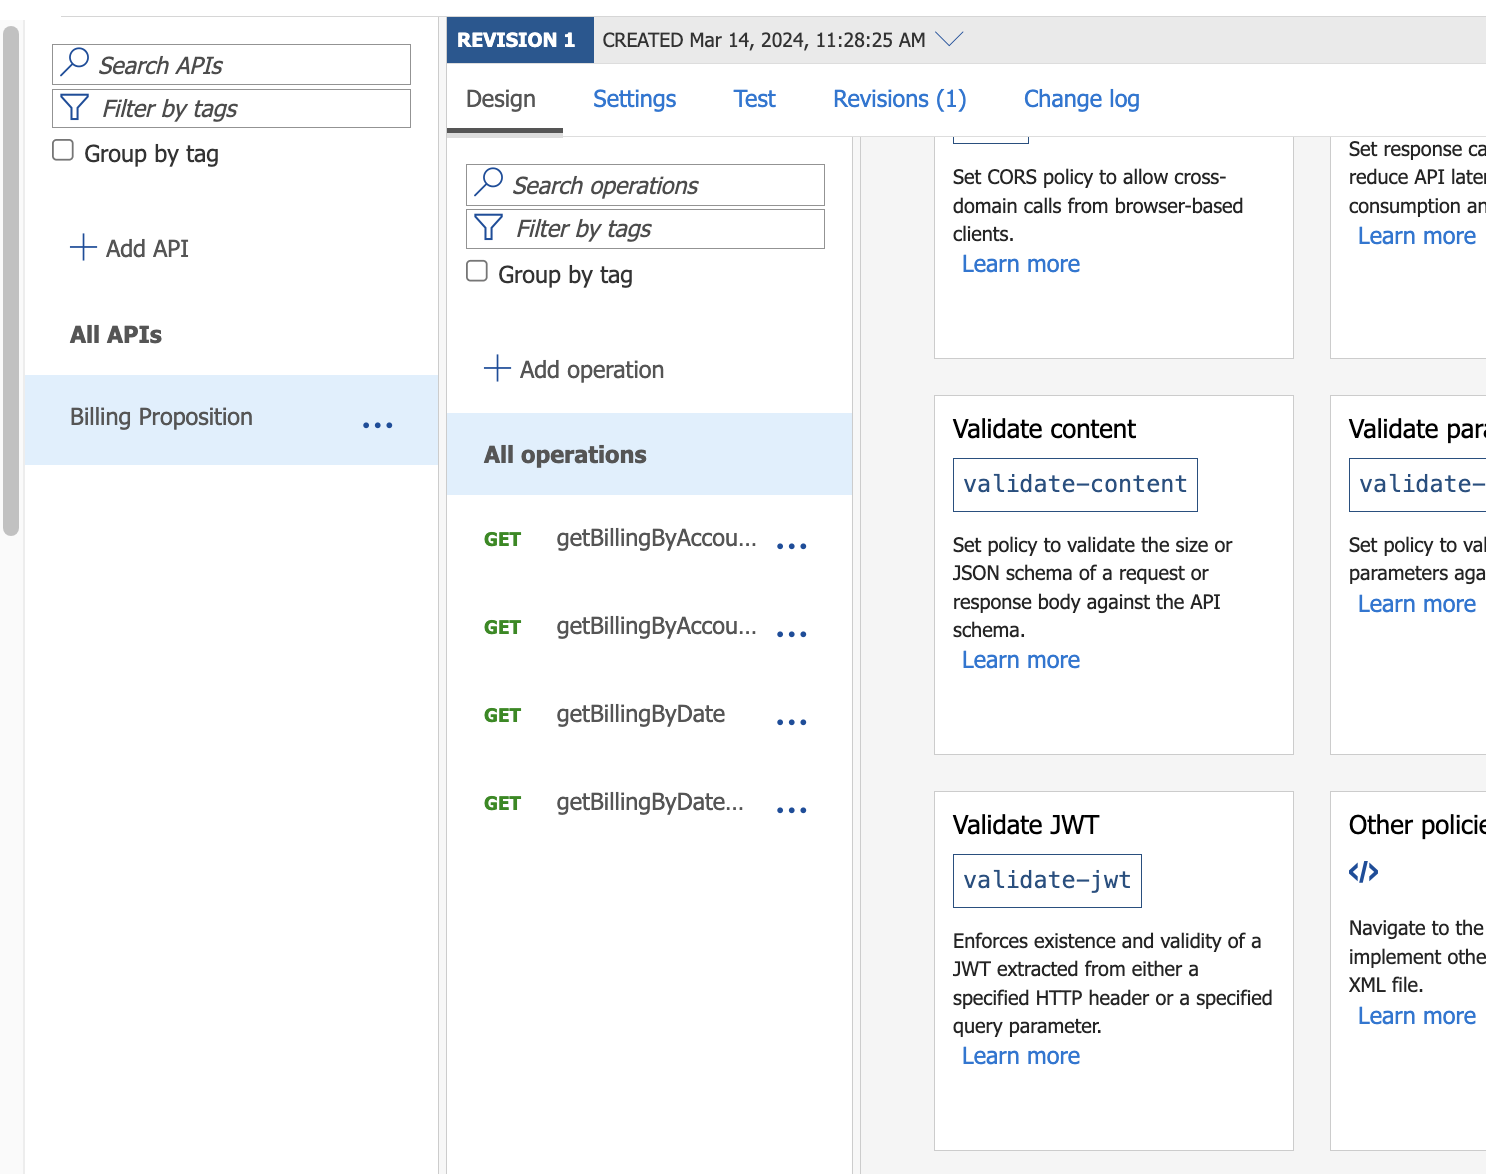
Now that the APP is configured, we can go to step 2, where we are going to set/create our policy in our API in order to gather the APP information to validate tokens and roles. In the section Inbound, click on Add Policy then Validate JWT.
1 - Setting policies
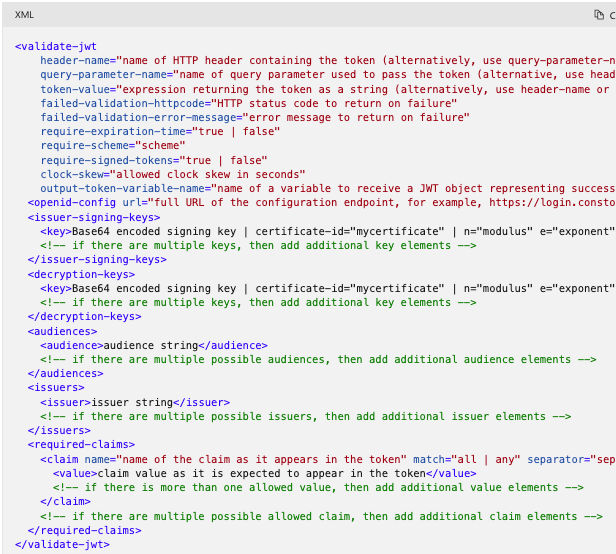
In the section Inbound, click on Add Policy then Validate JWT and fill the settings as below. In the Open ID URLs we have to add the APP tenant ID (and delete the v2 part of the URL) : https://login.microsoftonline.com/{{tenantId}}/.well-known/openid-configuration (This URL is in Microsoft Doc)
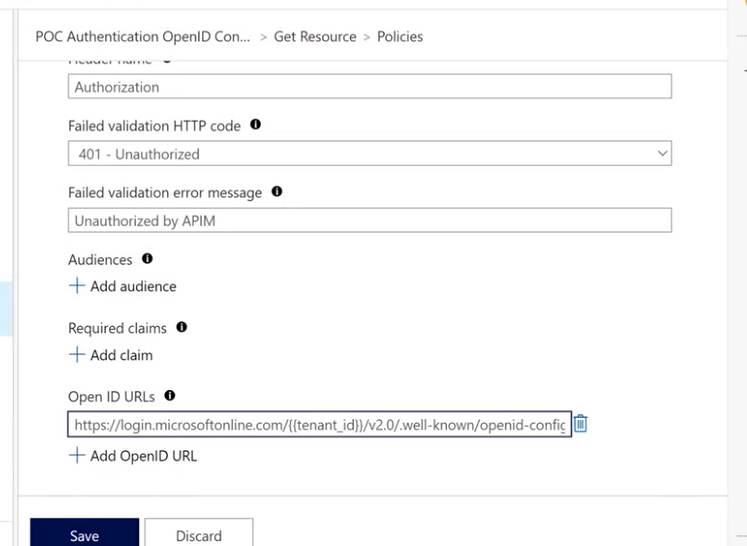
Once the form is validated, the new policy is generated and look like this:
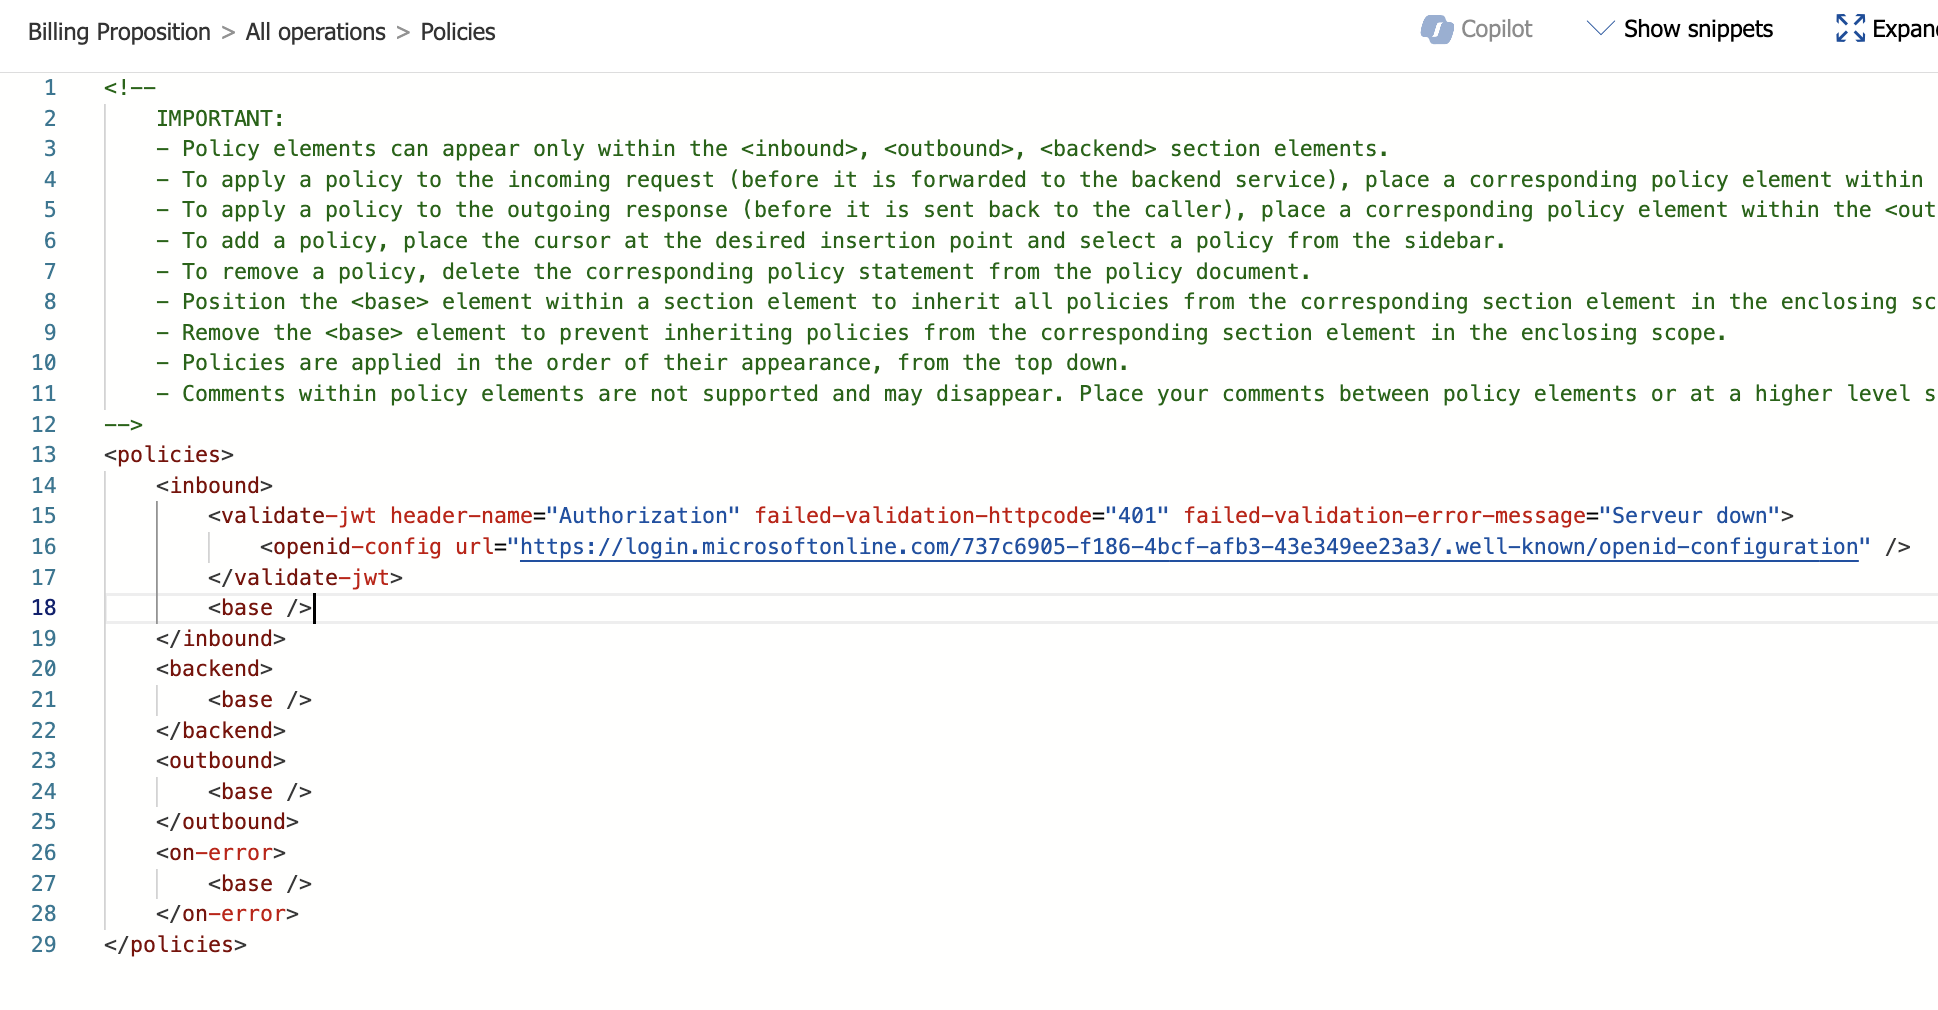
If you have one specific or multiple audiences to check just bring the clientId of the APP concerned to the tag 'audience'
2 - Assigning Roles to Users and Groups
Once Roles are specified in APP side, we can validate them in the Api’s policy. To validate a role in the policy, we just need to use the required-claim tags with a filter like this example. For more information we can find here the documentation.
Just fill the claim name with “roles” and the 'value' with the name or the ID of the role configured in App Registration side.
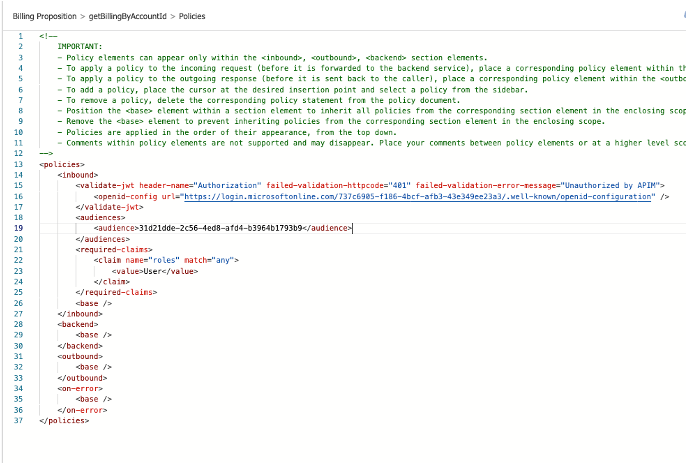
When the user will can the API, he will authenticate himself then the token will be check by APIM to let him pass if he has the role configured in the policy.
3 - Other token validation tags
For other token validation tags we can find it in the Microsoft documentation here: Validate JWT Policy
